Brown Paper Tickets uses cookies to provide the best experience on our website. By continuing to use our site, you agree to our Cookie Policy and Privacy Policy

Cookie Settings

Recipe: Double Chocolate Truffles

Our Farm and Food Specialist Patrick shared his delectable Double Chocolate Truffle recipe, just in time for Valentine’s Day. Enjoy!


DOUBLE CHOCOLATE TRUFFLES

Total time: 3 hours
Yields: about 24 pieces

1/2 pound bittersweet chocolate chips
1/2 pound semisweet chocolate chips
1 cup heavy cream
2 tablespoons coffee Liqueur (optional)
1 tablespoon brewed coffee or espresso
1/2 teaspoon real vanilla extract
Cocoa powder for coating

Special equipment: Heat proof glass bowl that fits a sauce pan as a double boiler

Combine bittersweet and semisweet chocolate in a heat resistant glass bowl.

In a sauce pan over medium heat bring your heavy cream to a boil.

Pour the boiling cream over your chocolate and add remaining liquid ingredients.

Place your bowl over a saucepan with two inches of simmering water in the bottom.

Stir everything together until a smooth ganache has been accomplished.

Allow mixture to cool for 5 minutes, then chill for two hours.

Scoop into 1 tablespoon portions and roll into balls.

Roll in coco powder, chopped nuts, sprinkles, spice blends, or whatever you like.

Chill for another 30 minutes, then enjoy.

https://vimeo.com/255633890


Food & Drink >

20 Ways to Keep Costs Down At Your Next Food and Beverage Event

A cost-effective food and beverage event takes hard work, attention to detail and careful planning, but it can be done.

Here are 20 ways to save money and trim the fat without compromising quality:

1. Act extra nice when negotiating costs and dealing with service providers. If you’re polite and reasonable when asking for a better deal, chances are you’ll get it.

2. Avoid peak season when choosing your event date. Book during off-peak, when there aren’t a lot of other events going on. More events mean rigid and higher prices.

3. Make a list of all the essentials and have at least five options with reasonable prices for each. More options will make it easier to shuffle things around and cut costs.

4. Set a clear, reasonable budget and stick to it. Knowing how much you can spend from the beginning will help you prioritize when planning your event.

5. Partner with other makers and producers. If you are hosting a wine dinner, ask a winery you like to sponsor your event. These relationships often work out well for both parties, as you can help get their name out.

6. Choose reasonably priced beverages. The beverage industry is packed with affordable, high-quality beverage options. Shop around and taste everything—not only is it fun, it will give you a chance to save some cash.

7. Buy in-season produce and flowers. You will not only discover the freshest local ingredients and blooms, you will find cheaper prices due to the abundance.

8. Borrow what you don’t have. Reach out to friends and family and ask if they have what you need for your event. You never know—Nana might have a closet full of stylish vintage cutlery and tablecloths ready to show off.

9. Portion control is one of the biggest ways to save money with a food and beverage event. Keep an eye on the RSVP list but wait until your headcount is confirmed to do your shopping.

10. Negotiate everything. A price tag doesn’t mean the price is set in stone. You can also offer something in exchange—naming the caterer to reduce food costs. Always ask and always be polite.

11. Keep your event casual. Formal events require a lot of little extras and your guests will appreciate laid-back, let-loose vibe. A causal event also offers flexibility when it comes to venue selection—for example, air conditioning might not be necessary if guests can wear t-shirts and shorts.

12. Skip the DJ and make your own playlist. Download your own music or use an app like Spotify.

13. Don’t over serve. Everyone should get enough food and alcohol, but ensure your food and beverage portions are reasonable to eliminate waste and save money.

14. Keep registration simple. Eliminate the need for the guest to do anything beyond registering. This will free up labor that would normally be spent answering emails and taking calls from confused attendees.

15. Plan your marketing budget carefully. Appeal to food bloggers and use social media to promote your events. These methods are significantly cheaper than purchasing ad space or a radio spot.

16. Choose your venue carefully. Instead of getting quotes from 5 different venues, try 10. Once you have quotes and understand the pros and cons of each venue, you can start to negotiate. Ask them to come down on the costs if you really like the space, but have a cheaper option on your list.

17. Source reasonably priced food when ingredient shopping. Finding high quality ingredients at a fair price is easier than you think—you just have to shop around. Head to farmers markets late in the day and you will get a good deal when buying large quantities of an item.

18. Do a plated meal instead of a buffet. Serving food portioned for each guest will give you complete control over food cost. If you want to go more casual, have a set amount of light appetizers (between 3-5 pieces per person).

19. Pair wine, beer, or cider with each course. Prix fixe beverage selection and meals will allow you to tailor the guests’ experience and control portions at the same time.

20. Reduce, reuse and recycle. Avoid using disposable products and minimize food/water waste. Going green reduces costs and helps the planet.

Event Tips >

Go Green: 15 Secrets for a Fabulous, Eco-friendly Food Event

Before you get too far into your event planning, consider its carbon footprint. Making your food event eco-friendly is not only a social responsibility; it’s also a good way to save some dough. Plus, consumers are making more environmentally conscious purchase decisions and greening your event could lead to more ticket sales.


Here are 15 steps:

1. Swap disposable for second hand. Instead of bottled water, use mason jars as glasses. Instead of buying imported tablecloths, scour the local thrift stores.

2. Do the math. Save money and reduce impact by carefully calculating the amounts of food, drinks and other goods. This will ensure you don’t have a lot of leftovers. 


3. Make your guests aware of your environmental efforts. They’ll make more of an effort to use the proper receptacles and may leave inspired to take extra environmental measures in their own lives.


4. Carefully consider your location. Give your guests green travel options such as walking, biking or public transportation. Make it a goal to minimize fossil fuel used to transport event-goers. 


5. Go local for food, flowers and linens. Not only will you support the local economy, by eliminating long-distance delivery, you’re reducing fossil fuel emissions.

6. Be choosy when it comes to food. Whenever possible, make sure your food is organic, seasonal, fair trade, no or low packaging and locally sourced.

7. Allow guests to pour their own water instead of filling glasses on the table. This will cut water waste. 


8. Up-cycle as many objects as you can. Consignment shopping not only saves money, it ends the cycle of manufacturing. Buy your glasses, plates, silverware and other items from thrift stores or borrow them. 


9. Avoid plastic items. Plastics are quite toxic to manufacture, petroleum-based, and aren’t biodegradable. If you need disposable silverware, try the eco-friendly versions made from compostable plants. 


10. Limit the number of print materials to just what is absolutely necessary. 


11. Hand out practical swag. Be sure any swag you hand out is durable, reusable and useful. The cost might be higher but definitely avoid cheap, throw-away trinkets.

12. Reduce paper waste with paperless invitations and ticket delivery methods. 


13. Find charities that can use undistributed handouts, such as pencils and paper to schools.

14. Clearly mark recycling, food waste and trash receptacles. Make recycling, food waste and trash containers clearly marked and readily available


15. Allow your guests to go casual. When people have to dress formally, they will need their clothes dry-cleaned. Air-conditioning is a must for a black-tie event in the summer; allowing guests to dress comfortably eliminates the need for climate control.

Food & Drink >

6 Event Details You Should Never Ignore

Event-Permits-PlanningWhether it’s a farm dinner, charity benefit, pop-up restaurant or other event, it’s easy to focus on the big three: food, location, decor. But it’s the less glamorous, often overlooked logistics that can make an event the best night ever … or a total nightmare.

Pay close attention to these details to ensure a hiccup-free event day.


1. Permits and Paperwork

Established restaurants, catering halls and other venues will likely have all necessary permits. But keep in mind that loud music, the hours of your event and even dancing may put it outside of the space’s “usual business,” and require additional paperwork, such as a sound permit.

Spaces that don’t typically host food events may require you to take out a full event permit. Make sure your space’s Certificate of Occupancy is current and will accommodate the number of people you plan to host. If you’re entertaining in a public space, such as a park, town square, public building, you will have to take out permits from your local city government agency (Parks Department, Department of Buildings, etc.).

Rules vary by city and state. Grilling, selling tickets, selling alcohol, restricting space from public use and your event’s hours name some factors that could determine the kind of permit you’ll need.

2. Alcohol Permits

It’s extremely important to file a permit to serve alcohol—these should be on hand at all times should you undergo an inspection. Some event permits come with a booze clause, but not all. Make sure you have everything in writing.

The local agency that grants you an alcohol permit will consider the length of your event, time of day, proximity to schools or churches and the type alcohol you plan to serve (beer and wine only, or full liquor). Make these decisions early and stick to them as changing a permit you’ve applied for may be difficult.

More restrictions (depending on locality) apply when it comes to the sale of alcohol at events; permits to sell are different than permits to serve.

Do some research on your local regulations and determine what will work best for you. In some instances, there are workarounds. For example, instead of selling beer directly, an event can sometimes sell tickets that attendees can redeem for beer. Consult a legal professional if you have any questions about permits.

3. Event Insurance

Each space is unique and may pose its own risks for attendees. Work closely with your team and the location’s team to ensure you have proper insurance to cover potential accidents (including food poisoning). Many venues may come with basic insurance, but expect the organizer to take on additional liability. Know what you are covered for, at what level and for how many people.

Run your event insurance paperwork (again: always get it in writing) by a lawyer. When it comes to insurance, better safe than sorry is the right attitude.

4. Inclement Weather Plans

You can spend months planning an exciting event, only to have to cancel at the last minute due to weather. Clearly, rain is a factor for outdoor events, but even if you plan to be indoors, there are many unforeseeable weather-related factors that could prevent attendees from reaching your location.

Have a rain plan well in advance of your event. Renting tents, securing an alternate location or having a rain date, may cost you a more time and money, but will pay dividends if the worst happens and you don’t have to waste all of that incredible food.

If you are working with restaurant partners who will order their products in advance, discuss your inclement weather plan. Paying for food you can’t use may take a hefty bite out of your budget.

5. Food Allergies and Your Menu

Every chef wants to serve a bit of mystery with a wonderful food experience. However, food allergies are serious and it’s important to clearly label menu items and spell out ingredients.

Make it known at check-in that a food list is available upon request. Ask attendees to email you about food allergies when they buy their tickets and provide alternatives. You’re not obligated to accommodate every attendee, but transparency is key.

6. Where You Source Ingredients

What and from where, you source the food you’ll serve is a less formal, but equally important consideration. Many food event ticket buyers want to know where your produce, meat and dairy come from and whether it’s organic, local or fair trade. The extra care you take in purchasing high-quality ingredients reflects on your overall vision and your community.

For example, if you work for a nonprofit concerned with migrant workers’ labor rights, you would be remiss to serve food produced on factory farms and in processing plants, as these types of places have a reputation for labor injustices. Your choices at all levels of the event reveal who you are and what you stand for. Be consistent.

These are just a few important details to consider as you plan your next big bash. Of course, all of the permit regulations will vary by your location. Leave yourself enough runway to seek legal advice and get all of your paperwork in order. Then focus on the fun stuff.

Got a question about this article? Our event specialist is happy to assist. Reach out.

Event Tips >

5 Easy Tips for Organizing Food Festivals

food-festival-breakout-eventsFood festivals are on the rise. Whether it’s cultural food, food truck rodeos, regional cuisines or specialty items like cheese (even mac ‘n’ cheese), food festivals draw in hordes of attendees. The appeal is obvious—everyone likes food and tasting a multitude of dishes in one spot is exciting and enjoyable.

But going from table to table outside in the elements, sampling different twists on the same ingredient can turn into a slog for attendees. Add variety with a breakout event—such as a cooking demonstration, a wine or beer pairing or even a sit-down, coursed-out meal. Breakout events offer a welcome distraction and a good way for attendees to recharge their batteries. A breakout event can also act as an additional revenue stream.

Before you add one to your festival, evaluate your resources and make a plan of attack. Treat your breakout like a completely separate event. This might mean relinquishing the organizing duties to a trusted crew member or bringing in a professional.

Once you figure out who’s doing what, it’s time to get all of the details in place.

Food Festival Event Tips

1. You’ll need a strong crew that can work independently to organize and pull off your breakout event. In other words, they need to focus on it, like it’s the main event. If you’re low on staff, this can be a challenge so consider this resource before committing to anything. Go over every detail and rehearse the event to work out the bugs. Expect issues to arise and have backup plans in place.

2. Promote, promote, promote. Festivals are busy, so be clear about your special breakout event. Get the word out early and pour it on. Ask sponsors, friends and other involved parties to promote via social media, as well as word of mouth. For event promotion advice, contact our promotions team.

3. Star power can help sell tickets. Reach out to local celebs—talk recognized chefs, radio or TV personalities, sports figures or government officials. Put together a proper proposal and send it to whoever fits with your event’s brand. Offer to include them in the official advertising efforts, include branding and logos, and announcement mentions. Don’t let speaking fees turn you off –partnering with a celebrity can boost ticket sales.

4. Consider the perceived value. When a ticket buyer is looking into your event it should be clear what they are getting for the ticket price—perks such as wine or beer with each course, exclusive access to celebrities, special tasting, take home goodies, etc. or anything else that can enhance the perceived value.

5. Don’t over complicate it. Find a solid and simple concept that your attendees will be familiar with, such as a cider or wine pairing. It will make your event easier to execute and for you to find people to help organize it. The overall concept should be simple, but you can spice it up with simple variations—just make sure your expectations and timeline are realistic.

Have a question about food festivals or breakout events? Chime in below or email me.


Event Tips >

How to Create a Suitcase Kitchen for Tours or Road Trips

Suitcase-Kitchen, Travel-KitchenLife on the road takes a toll on your body and wallet. Musicians, performers, traveling chefs and anyone living the van or RV life knows that. But it doesn’t have to. Bring in the Suitcase Kitchen and say goodbye to unhealthy hot dogs, burritos and instant noodles.

Cooking just one or two meals per week saves a fair amount of cash and benefits your mind and spirit—the better your diet, the more energy you’ll have for your gigs or sightseeing.

A portable kitchen doesn’t have to be a huge, costly project; you likely have a lot of this stuff lying around. The first item you’ll need is a clean, sturdy suitcase you don’t plan to use for clothes. I found a used one at a thrift store for $15 and it worked out great.

Consider your specific diet and the number of people you plan to cook for—the fewer the meals and number of people, the smaller and lighter the kitchen. As an exercise, cook your favorite meals for a day and write down everything you used.

Cooking Accessories

Select light-weight and multi-functional items that you know work well.
 Test the items at home to make sure they’re functional, so you don’t end up packing a can opener that doesn’t function.

  • Utensils
  • Tongs
  • Basting brush
  • Ladle
  • Cheese grater
  • Potato masher
  • Rubber spatula
  • Wooden spoon
  • Plastic spatula
  • Measuring spoons
  • Measuring cups
  • Kitchen sheers
  • Cheese knife
  • Chef knife
  • Honing steel
  • Bread knife
  • Utility knife
  • Whisk
  • Can opener
  • Vegetable peeler

Cookware

Consider cookware carefully—you have to find the right functionality while keeping the weight of your bag down. It’s OK to leave items behind in favor for multi-purpose tools. Before you go, test your items with a favorite recipe on the burner you plan to bring. You don’t want to get stuck in a pickle when whipping up some grub for the crew after the gig.

  • Stainless steel skillet
  • Non-stick skillet
  • Sauce pan with lid
  • Soup pot with lid (nothing too tall to be sure it fits)
  • Colander
  • Mesh strainer
  • Mixing bowl
  • Immersion blender
  • Light weight cutting board
  • Kitchen towels
  • Wide-mouth thermos
  • Tea egg
  • Coffee grinder
  • Small French press

Serving

Consider the pros and cons of disposable dishes. You will be creating extra garbage, which is a con for the planet. There are compostable versions of paper plates and silverware on the market however, most require a municipal composting program to avoid the landfill.

If you decide to use disposable serving items, I suggest only buying disposable plates, bowls and cups as needed and skipping the utensils and cups. Enameled camping bowls and plates are heavy side if you have more than a couple –they’re also durable and easy to clean. Tupperware or plastic are also valid options, but make sure they are durable.

Portable Stoves

I found that a butane burner is the most consistent heat source with the added benefit of being light-weight. If you’re flying, find a store that sells the butane when you get into town as flying with it is a no-no. If you try an electric burner include an extension cord long enough to reach outside your hotel room.

Most hotels frown on cooking in the room, so ask permission first or look for lodging with a kitchenette. When the weather is good, find a park or rest stop to cook at – many are equipped with grills and BBQ pits. Go old school—grab some charcoal or wood from the store. Always follow the safety guidelines.

  • Portable butane burner
  • Propane camp stove7
  • Electric burner

‘Tis the Seasoning for Travel

Buy the herbs and spices you like in the bulk section. This will help you buy less than what you need and also ditch the containers.

The containers that spices come in are made of glass and heavy, the ones that aren’t in glass jars tend to be the “Value” size which means that you will get more but it will be a lesser quality. I store my seasonings in snack-sized zipper bags to maximize space. I stash seasonings inside of other items in the case–I also use spice blends that I like, such as curries to save weight and space.

If you are adventurous, you can make your own seasoning blends at home–be sure to test out the mix first. Dried mushrooms and seaweed add a savory umami flavor to stocks, so I keep some in the case as well as instant potato flakes, which are a good thickener. If you use it sparingly, bullion cubes can add that extra something to a dish, but use it at the end it doesn’t end up too salty.

  • Salt
  • Whole black pepper (in a grinder)
  • Sugar
  • Cumin
  • Curry powder
  • Chili powder
  • Garlic powder
  • Dried mushrooms
  • Dried onion pieces
  • Oil
  • Vinegar
  • Red chili flakes
  • Bay leaves
  • Dried thyme

Other Suitcase Kitchen Tips and Tricks

SuitcaseKitchen for Road Travel

Leaving on a jet plane? If you plan to fly with your Suitcase Kitchen, look at checked baggage rates. Sometimes it’s cheaper to fly first class since you get three free checked bags. This will vary depending on airline, but if you work it right you can travel in style and save money.

Include a few jumbo garbage bags in your suitcase kitchen. Besides storing garbage, leftovers or even dirty dishes in a pinch, they can be used to line an empty suitcase and create a wash-basin.

I pack dish liquid and iodine into my Suitcase Kitchen for cleaning. These two are essential, but add your own personal favorite cleaning supplies. Bleach is good for killing germs, but it’s also caustic and somewhat dangerous.

At the end of the day, it’s all about finding what works best for you, and the way you like to cook and eat. It takes a little effort to put together a useful Suitcase Kitchen, but once you have it dialed in, it’s worth it. There’s nothing like a home-cooked meal.

Find this useful? You might also enjoy the 9-Step Recipe to Successful Cooking Classes.

Food & Drink >

A Day Down on The Side Yard Farm

TheSideYard-StaceyGivens-PortlandIngenuity is always on the menu in hip, scenic Portland. But The Side Yard Farm, an urban farm, supper club and catering company stands out even in this off-beat city. Located in the northeast Cully neighborhood, this unique space supplies fresh, local ingredients to area eateries. In addition, The Side Yard Farm hosts food events: brunches, butchery classes, bike-in movie nights, and cooking classes.

In the latest episode of Journey to the Center of the Plate, Stacey Givens, The Side Yard’s farmer/chef/owner talks about her passion for agriculture, cooking, events and teaching others about food.

Urban Farm in Portland

Fun fact: Givens is the 2015 Chopped Champion, so you know she has some major chops when it comes to cooking. Definitely a place the foodies flock to. View upcoming events at The Side Yard.

Food & Drink >

Peek Inside Sno-Isle, a Natural Foods Co-op

Natural Foods Co-op Hey there, I’m back with the most recent episode of “Journey to the Center of the Plate.” I hope you’ll dig this one as much as you did the first. In this episode, you’ll meet the friendly faces of Sno-Isle, a natural foods co-op in Everett, Washington.

Sno-Isle’s strong community ties and continued passion for access to fresh, local food products will inspire and uplift. A co-op is owned and governed by its members, people who use its products or services, or are employed by the business.

Inside Sno-Isle Natural Foods Co-op

Stay tuned, another episode is coming next month. For additional videos covering interests from food to music and everything in-between, find us on YouTube.

Food & Drink >

Premiering Journey to the Center of the Plate

PopUp-RestaurantsPop the popcorn. Dim the lights. Get comfy. Brown Paper Tickets is excited to debut a new video series on one of life’s most universal topics: food.

I am proud to introduce this series, which is my quest to find a better and more complete understanding
 of how food gets from the field to our plate. Journey to the Center of 
the Plate endeavors to discover amazing trends and the deepest roots of 
our regional food systems.

Each month, watch for a new episode. Travel with me, the Stone Soup Chef across the verdant Pacific Northwest from cities to the countryside, from pop-up restaurants to co-ops and ice cream shops.

Ready to watch? Episode one features Rough Draft, a Seattle pop-up restaurant.

  Ep. 1: Seattle pop-up ‘Rough Draft’

[youtube https://www.youtube.com/watch?v=CMBdpTrHrKM]

Feel free to pass this plate around; it’s meant to be shared. Link to it, embed it on your blog or social media and watch out for more next month.

Food & Drink >

9-Step Recipe to Successful Cooking Classes

Teaching-CookingClassesJust as there are tricks to the perfect sandwich (hint: fresh bread for one), there is a method to making your cooking classes rewarding and mmm-azing for both teacher and student. Not only can your class satiate your students’ thirst for new skills and knowledge, it can also raise money for causes.

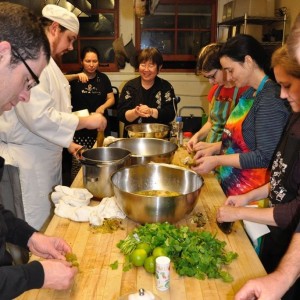
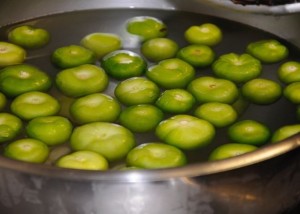
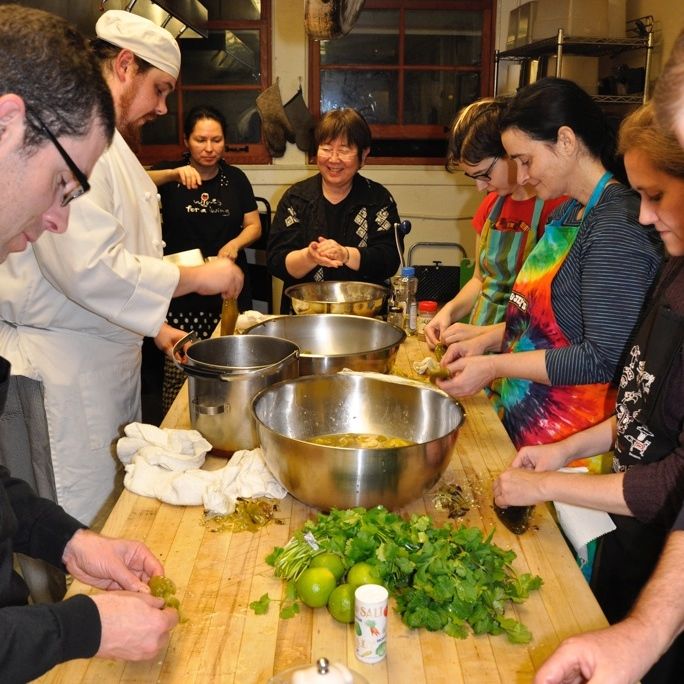
Seattle’s El Centro de la Raza is a fine example. A simple tamale-making class evolved into a full curriculum of Latino and South American cooking classes. Eventually, these classes raised more than $50,000 to support bilingual community services.

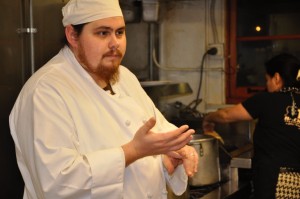
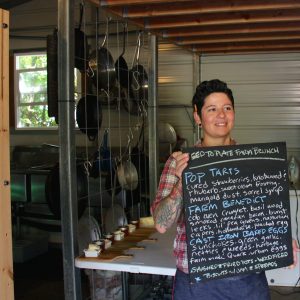
As Brown Paper Tickets‘ Food, Drink and Farm Specialist, I coached and trained a group on teaching family recipes, sharing culture and traditions to raise funding for community services. My program takes excellent volunteer cooks from the community and turns them into teachers. I broke how to teach cooking classes down into basic steps below, so that anyone can start a volunteer-based cooking school and get community members to teach their family recipes. If you’re in Seattle, join me at my next class when I teach how to make paella.

Here are 9 steps to a well-organized, rewarding, fun and (hopefully) fundraising cooking class or program.

1. Become an Expert
You must learn to walk before you can fly. First things first, you need teaching experience. You must really know your stuff to organize others who have little-to-no teaching experience.

Try teaching cooking classes in your home with friends and family as pupils. This should be a free event to give you a realistic perspective of teaching. In addition to teaching your own class, try attending a few run by professionals. Ask a lot of questions and take copious notes.

2. Host a Volunteer Meet + Greet
Host a meet and greet for potential volunteers. Keep the mood light and offer food and drinks. Make it a fun social event where everyone can chat. Once everyone is settled in and socialized, announce the project’s goals and needs.

Have potential volunteers sign up on a free registration page through Brown Paper Tickets. The process is fast and easy and the link can be directly e-mailed. This allows you to keep track of attendees as well as easy communication.

3. Get to Know Your Group
Here’s an easy icebreaker. Gather everyone into pairs and ask them to talk about what they know best for a few minutes. Once they have had time to chat, ask each person to introduce their partner.

4. Teach What You Know

TeachingCookingClassesWe can all teach just as we can all learn. Three tips to better teaching:

Meet students at their levels. If someone asks you about how to microwave ketchup soup, don’t insult him or her, don’t laugh and don’t start showing off. There’s plenty to learn from less experienced people.

Be kind when criticizing. Being an “expert” (as you will be by the time your class shows up) means you know more than your students. That is why they are paying to be in your class. If you need to step back to go over remedial skills like safety techniques, do it. Check your schedule and note any schedule changes as things progress. But take the time to teach the skills your pupils will need at home.

Celebrate mistakes. There will be messes, fallen cakes, burnt caramel. That’s okay. Be sure at least one batch of everything on the menu makes it to the table. Talk about the mistakes or failed dishes, why they happened and what to watch out for next time. Make a few mistakes yourself–laugh them off and talk about how to fix them. Many students are afraid to make mistakes. If you can teach people to accept mistakes and move on, you’re my hero.

5. Find Your Audience and Theme
Once you know what everyone is best at cooking, you can talk about how to turn that into a class. Map out who, what, where and why. Once each volunteer selects a subject, you can start finding the audience.

However, sometimes you find your students before you find your subject. If fans line up every evening for your amazing open-fire-pit pizza, then your topics are obvious. Dough, sauce, toppings, fire management and whether to fold or stack slices. However, if you don’t have a restaurant or bar, start by looking around at trends you see in the people you think may take a class.

Generally, you want to teach a dish or cuisine folks can learn in a couple hours to the degree they are confident to make it at home. There are exceptions of course. Take pickles, for example. You can’t really make a great pickle in a couple of hours, but you can certainly have samples, teach basic styles and techniques. Pick something that interests you and you’ll be a better teacher.

6. Know Your Subject Inside and Out

Limes, from teaching cooking classes

Pizza is a great example. There are so many styles; it’s mind-boggling. In the end, it’s just flat bread, sauce and cheese. But people prefer one style over another and that’s what makes it interesting. You don’t have to teach every style in your class, but know enough so you can answer questions. Remember, you’re the expert. If you can’t answer questions then you lose respect and sometimes, control of the class.

7. Include these Elements on Your Event Page
• A detailed menu (ingredients, descriptions)
• Chef or organization bio
• Allergy or restriction questionnaire
• Clear refund policy
• Price the class accordingly (be sure the price covers your food and labor cost)
• High-quality images of the dishes you will serve and cook (videos too)
• Spread the word to friends and consider a friends + family discount
• Information on attire, if producing a themed event
• Comp or discounted tickets for staff (training hours are expensive, this could help train your staff and make you a cool boss)
• Event start time and meet-and-greet time, if you want people to show up early
• Business hours
• A clear direction for your class. Make sure your event description is clear—expectations are hard to reset. If it is a demo, tell them so.

Tip: Don’t be afraid to extend the invitation to like-minded organizations and get to know other event organizers in your industry.

8. Practice, Practice, Practice
Go through the steps and write a lesson plan for your class. Practice it with friends. Scripting is a good first step, but don’t pass up the chance to show and tell with a buddy. Tape it using video if possible.

Type up your recipes and have copies ready for your students. Compare your recipe with two or more examples to ensure it is easy to follow. Include tips and secrets and absolutely provide your email address or website. Make sure you are realistic about the number of pupils you can teach
 at once. Start small and build from there. Also be sure you have enough ingredients to complete the menu. Striking a balance between size of class and courses is important.

Create an ingredient checklist and triple check it against your recipe or lesson plan. Do as much prep work as you can prior to the class, but leave enough work to share with your students. If you are cooking a more complicated dish or large quantity, pre-chop veggies. You can always demonstrate on a small quantity and have your pupils try it too.

Pre-measure your ingredients and have them ready to go in separate containers. This will help when you are cooking the dish and you will be less likely to miss something (check ingredients against recipe). Socialize with the class. Before you start, take the time to ease into things. This will relax everyone and make them comfortable.

Taste everything with the class as you go. When possible, eat your creations together at the end. A meal enjoyed in a group is a wonderful reward for a job well done. Make sure you have take aways and containers for the students to bring home. There are three types of take-aways: food, resources or value added. Food take-aways include leftover dough, ingredients or components. Resources would be things like worksheets, syllabus or directions. And value-added means marketing materials, like coupons, tote bags or branded goodies.

9. Attract Sponsors for Your Next Event
Now that you’ve decided to present an exciting new event or program, you wonder: How will I make all this happen with my existing budget? Building a presentation (or deck) and seeking community or corporate sponsors can close funding gaps for new initiatives. It can also help begin and grow future investment in your programs by your sponsors as they witness your work’s impact first-hand.

Here’s what to include in your presentation:

• Clarity of mission + vision
• Testimonials from past program participants and community stakeholders
• Clear description of program or event
• Your ask (arguably, the most important). Be very specific.
• Levels of giving/sponsorship packages
• Sponsor benefits or givebacks: What will your sponsor receive per giving level?
• Other donors or matching gifts opportunities
• Your contact information + organizational branding

Good luck and happy cooking. Feel free to comment with your own tips if you’ve ever taught cooking classes.

Event Tips >