Brown Paper Tickets uses cookies to provide the best experience on our website. By continuing to use our site, you agree to our Cookie Policy and Privacy Policy

Cookie Settings

The Stress-Free Guide to Making Event Promo Videos

make-a-videoIt’s 2019 and time to get real. Video content is no longer a “nice-to-have”; it’s a “must-have.” According to OptinMonster, video marketers get 66% more qualified leads per year. Imagine what a good video campaign can do for your ticket sales.

Here’s a guide to creating a promo video for your event.

Start with Solid Goals

Start with a clear mission and well-defined goals. Are you trying to drive ticket sales, increase web traffic or boost awareness? Too many creative projects lose direction because of muddled goals in the beginning.

If you do a lot of events, perhaps you want to make a universal video that doesn’t point to a particular event but just grabs interest. This way you can reuse it for more than one event, tailoring each one to reflect the event that you are promoting.

Make a Creative Brief

First, take the time to figure out the feeling you want your video to convey and the key message you want your audience to take away.

Document your event promo video ideas in a creative brief – ad agencies and creative departments use briefs to nail down their goals and delegate action items.

Include a key messaging hierarchy, roles of all people involved, launch date and tentative work-back schedule.

Once you’ve figured out why you are making a video and where the video will end up (Facebook, YouTube, your website, your event page), it’s time to start on the creation process (aka the fun part). Hiring a professional isn’t your only option. Tools like Promo.com allow you to create videos using stock video and graphic treatments.
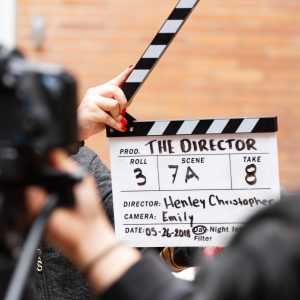
Videography

According to Thumbtack, the average cost for a videographer to film your event is somewhere between $750 to $1,000.

Coastline Productions reports, “An industry rule of thumb estimates about $1,000 per finished minute of video for a quality presentation, but we find that we usually come in closer to $800 per minute for the typical 5-8 minute corporate video involving a script, voice talent, and illustrating footage.

Don’t knock the phone camera—believe it or not, there are plenty of successful videos out there that use them. Tripods and additional lenses for phones, as well as microphones can help make your phone video look high quality. Shoot test footage and watch it on a big screen to make sure it holds up.

Try and record the shot simultaneously on multiple cameras. This will allow you to set up for different angles or be able to choose the better quality recording of the two. When using multiple cameras, the devices should be similar to maintain continuity.

Creative Direction

This video promoted Know Your Value 2018. Note how it highlights each keynote speaker.

You can take a video in so many different creative directions. Before you begin the shoot, look for event promo videos that sing to your heart.

Possible creative directions:

  • Event documentary – Video of your past event to get people hyped for the next one.
  • Making of or behind the scenes – Interview keynote speakers or performers, show the prep work, rehearsals and your crew getting ready.
  • Informative – Straight-forward with plenty of captions, titles, a clear narrative, and visual aids. The goal is to inform people about the details of your event. A narrator may explain all the great aspects of your event including ticket prices, location, and what to expect.
  • Humorous – Use a joke as your main story line or create a funny situation. Just make sure it’s funny. As Aristotle said, “the secret to humor is surprise.”

Storyboards and Shot list

Once you have your concept and direction, put it on paper. Create the storyboards, write the script, and make shot lists. Share these with your crew.

You can hire someone to do this work for you or do it yourself, but don’t skip this step. Good organization ahead of time leads to a well-done video later.

Storyboards

Keep it simple. Use a template with squares printed on it or just fold a piece of paper in half—this will give you four panels (two front, two pack) per sheet. Each panel is a shot—try to draw your vision for each shot in the panel. Number each panel so you can make notes and create your shot list based on that.

Script

Scripts should be written as true to the desired dialog as possible. Include actions such as *she sips her coffee* as well and explain the details of speech and action. It may be helpful to describe the scene before each round of dialog in order to set up the scene for the actors.

Your video script should include:

  • Each scene’s dialog in a conversational format. (Read your work aloud to make sure it sounds authentic)
  • Emotion descriptors to accompany each line
  • Helpful information on how to pronounce or enunciate any creative words or phrases.
  • A clear story with a beginning, middle, and end.

Once you have a completed script read and re-read it aloud editing as you go until it’s ready. Don’t be afraid to find a second person to help read and edit your script at this point.

When it is all wrapped up and ready to go, you will want to get all of your actors together and do a couple of table read through sessions. This will help get an idea of how it will sound in your video.

Shot list

It’s time for the shot list and production notes. Mark your script and storyboards to indicate what shots will go where. Number the shots and write your list with a lot of technical details, such as pan left, zoom in slowly, bird’s eye view to describe the angles and camera motions.

Consider your equipment. You may want an aerial view of the city, but if you’re on a tight budget and can’t afford a drone, it might not be doable.

Post-production

Congrats – you made your first video. Now you can move on to the post-production phase. Editing requires patience and an eye for detail. You will also need a fairly powerful computer and video editing software.

Macs are popular for creative types because they support and even come with software installed for video. Applications, such as iMovie are definitely usable for novice film editors; they are just limited when it comes to animated transitions and the filter and special effect quality.

Whatever software you choose, watch the tutorial at least once and keep it bookmarked. Save your work often to an external hard drive. Redundant back ups are a really good idea with video (and really everything else), because it would be devastating to lose all that work.

Additional Event Promo Video Tips

Think carefully about length ahead of time and know where your video will appear. Web-friendly videos should be kept under a minute. For some applications, your video might need to be even shorter at 30-45 seconds, which goes fast when you’re trying to fit in your event details.

Keep in mind that when you post videos on Facebook and YouTube, you’ll have a spot to include text and links. So you can probably do without the “informational screen.” (You know, the one with your url, address, event details, and all that other stuff no one will be able to read.) Put the important details in the video description and focus on the visuals.

Final piece of advice—watch as many event promo videos as you can. Take notes on what you like and don’t like. Think about the technical details –what did they use to get the shot that you liked?

Do you have any tips? Let’s hear ’em.

Event Tips >

How to Create Marketing Personas for Events (And Why You Should)

Throughout my illustrious career as a marketing word weaver (copywriter), I’ve heard some variation of this line: My product is for everyone. My young adult fiction novel is for … everyone. My charity 5K is for anyone who can make it.

Where’s that facepalm emoticon?

Whether it’s an event, a product, or a one-act play, start with your tribe, the people most likely to be interested. Lucy, the thirty-something mother of three might not be into your late-night EDM festival, but your start-the-day, wake-up rave with full juice bar? She’s there. (Heck, I’m there).

Find your event’s target audience and create marketing personas so that you’re serving digital content in the right places to the right audience, and also so that you don’t waste time (and money) pursuing those likely to skip.

Start with Current Attendees

Consider your last event. Who attended? What were they wearing? What were they doing?

Were they glued to phones or carrying around moleskin journals? At the events I attend (book readings, tastings of any kind, live music and comedy), most people are kind of like me.

This isn’t to say they have the same physical attributes, but that they are in the same life stage, consume similar media and generally share interests.

Write an Event Questionnaire

Write an event questionnaire to find out more about your attendees and use the responses to inform your personas and your social media targeting.

Ask what region they live in, what interests them, what they read and listen to. Use this info to tighten up your social media advertising. If people aren’t flying to your festival from out-of-state, don’t waste money on a national campaign. Narrow your advertising to within a drive-able range until it grows.

Lastly, be brave and ask what you could do better. Some feedback might feel like a punch in the gut, but resolve to take a “know better, do better,” approach.

The Data Dig

Use insights from your social media platforms to clue you in on your demographic. The data will tell you what region your attendees come from and you can tell what posts are working and what aren’t based on how many people engage with them. Find out what key terms your attendees used to find your events.

Optimize your Facebook event and your Brown Paper Tickets’ event page to include those key terms and definitely try to use them in the title. Blueberries & Rolling Pins isn’t likely to be found in a search, but Blueberries & Rolling Pins Pie Making Class is much more SEO-friendly.

Write Event Marketing Personas

Before you design flyers or write your event description or pick your marketing channels, create up to three personas using your research.

Include standard demographic data, such as age, salary, location. Look for photos in the public domain that match this fictional person. Give them a name and include their values and motivations.

If you’re starting a series of cooking classes for example, marketing personas will help you identify whether you’re marketing to a “Johnny-who’s-never-cooked-before” or “Cheyenne, a whiz in the kitchen psyched to brush up on her techniques.” Or say you’re working on messaging for a music festival—are you marketing to GenX Jimmy or Micah the Millennial? Jimmy is more likely to see your flyer, while Micah would more likely be brought in by your event’s Insta story.

Sure, you might want both to buy tickets, but narrowing down your audience will help define your marketing channels and the language you use to communicate. Pick one persona as your target and the others as your secondary audiences.

Once the persona is created, speak directly to them in all of your social media posts and in your event description. However, avoid exclusionary language–you’re not trying to make people feel unwelcome, you’re custom-tailoring your marketing.

Rely on what motivates your persona (saving money, helping others, escape) and speak to that.

Here’s an example:

Example: Hey moms, have dad watch baby for a change and relax at our spa weekend…

Vs.

Hey, need a break? Come in for well-deserved R&R at a special spa event. The palm trees are a’swaying… 

The first example makes a number of assumptions and doesn’t feel inclusive. The second speaks to what most appeals to the persona (escape).

Run an A/B test to see what messaging resonates better with your perspective attendees.

Keep Interest

Now that you created your persona, keep them engaged by refreshing your content and offers. Make an offer that speaks to their values.

If they’re more budget-conscious, offer discounted tickets. If they’re active on social media, create a ticket giveaway contest on their preferred channel. Consistently post third-party content from websites they’re most likely to read.

What did you name your marketing personas? That’s the most-fun part.


Event Tips >

Easy Tweaks to Make Your Event Page Professional and Pretty

Hosting an event on Brown Paper Tickets? Congrats. Creating a visually compelling and informative event page is a key factor to selling out your event.

Before you create your event page, the first thing to do is brainstorm various aspects that are important to highlight. To do this, consider events that have attracted you in the past.

Were they visually appealing? Did the description spark interest and intrigue? Take what inspires you and translate that into your event creation. Along with a clear and compelling event name, you will want to create a compelling event description and short description.

  • The short description will display in search results, in our weekly event mailing list and third-party event calendars. It is a summary of your full description with intriguing aspects of your full description.
  • Give potential attendees all the information they need, so they have no lingering questions that could delay ticket purchase.
  • Highlight what attendees should expect, and the unique aspects that set your event apart from similar events.
  • Use bullet points to display key information so the information is easy for readers to scan.

Add a visual component next. Do you have high-quality images of the artist or event flyer? If so, upload it onto the event itself; this will further polish the professional look of your page. Feature the artist you’re promoting by uploading recent live performances, artist interviews, or anything relative to the performers and the event. Think about the possible attendees that have never heard of the artist and display any work that you think highlights the artist best. To make a bigger impact, upload the material into the event description to appear full frame so that everyone can gain a feel for the genre, style, and sound. Unsure how to post a YouTube video full frame?  This simple tutorial has you covered.

You can also use basic HTML coding to hyperlink artist’s websites, social media pages, or relevant interviews or articles. This can also help boost your presence and improve page ranking on search engines such as Google.  You can see exactly how things will look on your page with our tutorial here.

Now, let’s talk about sales incentives. Buyers often wait until the last minute to purchase tickets. Offering an incentive to those who secure their spots early on can jumpstart your sales and give you an idea on “where you are” in promoting your event.

How to incentivize attendees to buy early:

  • Create a higher day-of or door price
  • Have early bird pricing or tiered pricing that rises closer to the event
  • Offer priority seating or entry to the first ( x ) people that secure tickets

To tie up all loose ends on your event page, you will want to link your Facebook Event and Twitter account to your Brown Paper Tickets event page. Linking everything will allow for a smooth transition for possible attendees to further get a feel for your event and performers.

You can further boost your search engine ranking by implementing basic Search Engine Optimization (SEO) techniques. That way, when people search certain key terms, they’ll easily find your event. Avoid copying and pasting. Vary your event description from one site to the next—search engines don’t like duplicate content, so use different descriptions wherever you list your event. Make sure you add keywords—if you’re hosting a theater or music event, add “music” or “musical” or “”theater” to help your event appear in search results. But don’t jam your descriptions full of these terms; use them naturally. Read this post for more event-related SEO tips and techniques.

Once you have everything up and running, keep that momentum going. Think about how you are going to announce and present your event on social media. Check out these 10 Crucial Steps to Announcing Your Events on Social Media.

Event Tips >

10 Crucial Steps to Announcing Your Events on Social Media

Event-Announcement-SocialMediaGot the event launching jitters? Sasha from our promo team gives solid advice on the most effective way to announce an event on social media. This strategy will help you get all those likes, shares, “going” and “interested” pouring in.

Use steps 1-5, before announcement and steps 6-10 at announcement.

1. Choose an ideal date and time to announce your event

Timing is crucial to ensure as many people as possible see your event. If you make your announcement at an hour when folks are likely asleep, at work or otherwise occupied, the announcement could flop.

The best time to announce an event on social media is generally in the morning around 11AM (in your event’s timezone), so that it will be up and visible when most people check their Facebook at lunch.  The day you choose is important as well. Monday through Thursday is ideal, as people tend to have more unpredictable schedule on weekends and may miss the announcement.

Be attentive to other factors: it is ill-advised to announce on a date when there is an event that is similar to yours, or if there is big news that day, e.g. World Series Game, eclipse, UFO sighting, you get the idea.

2. Create a Brown Paper Tickets event page

You will want to have your Brown Paper Tickets ticketing page up and ready to go so that people can purchase tickets when they know about the event. Our system makes it easy to schedule the date when your sales begin, so you can create the event ahead of time, and have sales go live automatically when you announce your event.

3. Create your flyer image, Facebook Banner image and IG Square image

Compelling visual images are essential for effective event promotion. Your flyer design is more than the who/what/when/where/why; it’s the face of your event, so you want to make sure it looks good wherever you post it.  The key is properly sized flyer images.

Create or ask your designer to create three versions of your flyer image, since they may need to adjust the layout for each one.  If three separate designs are a bit too much, it’s still advisable to create some version of your flyer that will fit each of these sizes with all text visible.

A banner image:

Size: 1920 x 1080

Uses: Facebook Business page banner image, Facebook personal page banner image, Twitter header

A square image:

Size: 1000 x 1000

Uses: Instagram posts, Facebook profile pictures, Facebook posts, Twitter profile photos, general social media sharing

A flyer/poster sized image for printing:

Size: 1650 x 2550px (11 x 17 inches)

Uses: Printing handbills and posters, general posting.

While the standard size for printing flyers is 5.5 x 2.125in (a quarter of a standard 8.5 x 11in sheet of paper), the size listed above is big enough that it can be printed onto a poster or a flyer.  However, because of the size of the image, the image will have a large file size. You may consider asking your designer to create a smaller version for social media posting.

4. Draft your announcement post for social media

Before you launch your event, write out the text you will post when you announce your event on social media.  This post should be clear, concise and engaging, and contain basic details to stir up excitement.

There are a few ways you can go with this announcement. There’s the basic: “We are proud to present a night of roots reggae one night only at the Crocodile.” And the involved and unique: “Some try to avoid hordes of the undead on their weekend, we say Bring it On! Three screenings of Dawn Of The Dead, this weekend only at the Balboa Theater.”

Your goal is to get people to like, comment, or share the post, so make sure the content draws people in while staying on-brand.

Be brief. While you want to provide the important details, you don’t want the post to end up too long. Aim to strike a balance between informative and concise.

5. Make sure everyone on your team is ready to announce

Event-SocialMediaThe whole point of a good announcement is to make a splash, and the best way to do this is by having as many people as possible posting simultaneously about your event to get the word out.

Make sure anyone helping you with your event or willing volunteers (coworkers, friends, family) are available, at their computers, are given specific instructions to post about the event and send Facebook invitations to their friends. This team who agrees to help you ahead of time are your primary promoters. As you’ll see, a number of the following steps require you to communicate and work directly with them to maximize your announcement’s impact.

6. Create Facebook event page

Learn how to create Facebook event pages with these easy instructions.

Some notes about adding details to your event:

Host: This field allows you to specify your event’s host.  If you have a Facebook business page, you will be able to select either your business page or your personal page.  You can always add other people as hosts later. Depending on your settings, hosts have the ability to edit the event, or to add other hosts.

Event Photo: Use this field to upload your event’s banner image.  The image will appear at the top of your event page.  If you don’t have a flyer, consider using an image related to your event, a photo from a past event or a stock photo of relevant subject matter. As mentioned in Step 3, however, having a properly sized flyer image greatly improves the look of your event page, catches people’s attention, and provides all the necessary information about your event in one place.

Event Name: Enter a short, clear name for your event.  Your event title may not be in all caps, and cannot contain excessive amounts of symbols.  It also helps to make your event title easily searchable so that people can locate your event easily. “The Beatles Live at the Showbox” is a good title, “***BEATLES LIVE SEATTLE ((@ SHOWBOX))!!!!” is not.

Location: Enter the exact location of your event.  Many venues will already have their information stored on Facebook, and will appear in the drop down menu as you type in the venue name.  If you see your venue appear in this menu, select it.

Tags: Type in tags for your event and select the results from the drop down menu.  These are based on things that people have selected as interested or “liked” on Facebook.  These tags can be specific or more general, but should always be relevant to your event. Examples: theater, wrestling, Seattle techno, hiking live music.

Ticket URL: Enter the URL for your Brown Paper Tickets ticket sales page.  This will provide an easy and direct link for people to purchase tickets to your event, and will appear near the top of your event page.

Co-hosts: If you would like to give anyone else access to edit your event page, enter their names here.  If you would like to add another business page as a host, first add the individual who is the admin for the business page, and then they will be able to add the business page itself.

7. Send as many Facebook invitations as possible, and have your friends do the same

Once your Facebook event page is created, invite your primary promoters to attend.  They will receive a notification on Facebook that they have been invited to the event, and this will signal to them that it is up and ready to be promoted.  Once you and your primary promoters have clicked “going” on the event, each of you should send as many invitations as you can to anyone on your friends’ list who might be interested.

This may be the most important step in the announcement process as it provides an initial promo blast across your networks as well as your friends’ and coworkers’ networks. Think of it this way: if you and 4 other people each invite 500 friends, you’ve just advertised to 500 people instantly, without spending a penny.

8. Make your announcement posts

Once you and your primary promoters have sent invitations on Facebook, it is time to post the pre-written announcement you drafted in step four.

Facebook uses a number of algorithms to determine how many people see posts that you make.  To make sure your post gets as much visibility as possible, keep in mind that the following post types get the best visibility:

  • Short (90-140 character) text posts
  • Posts with images, the less text on the image, the better
  • Posts that do not explicitly mention the fact that they are promoting an event and avoid using certain key words such as “event,” “buy tickets” or other terminology that clearly indicates your post is (essentially) an advertisement.
  • Posts that do not contain direct links to Facebook event pages or Brown Paper Tickets ticketing pages.

What exactly should you post?

Your square flyer image or a visually engaging photo of your performers (or press shots if available,) accompanied by your announcement text that you prepared earlier. Make this post from both your Facebook business page and your personal page.

How do you direct people to buy tickets if you can’t link them to the ticketing page in your post?

Put the link to your ticketing page or Facebook event in the comments of your own post, after the post has been up for a few minutes.

Facebook uses automated systems to detect when people are promoting their events, and if you’re not paying for advertising, Facebook will make sure your post goes to the bottom of your friends’ feeds.  Posts with just pictures or text tend to get more “likes” and comments, and are thus seen by more people.  You can use this to your advantage; make a post that doesn’t contain an event link–at first. Then add the link in the comments once the post starts to gain visibility.

Additionally, post a link to your Brown Paper Tickets ticketing page in the “Discussion” section of your Facebook Event Page, and pin the post (here are instructions).

9. Change your Facebook profile/Business page banner image, and encourage your friends to do the same

By changing the banner image on your page and on your profile, you are effectively getting an extra promo boost every time someone visits your page.  If you encourage your primary promoters to change their banner images as well, it will increase the number of people who see your flyer image across your promoters’ networks.

10. Make a follow up announcement for anyone who missed the boat

Once your Facebook announcement is done, you’ll want to make sure you follow up later in the evening with an additional post so that anyone who was busy or away from during your earlier announcement gets caught up.  The ideal time to make this post depends on your audience, but 6-9PM is usually a safe bet as a lot of people are home.

Announce on your other networks

Have a Twitter account?  Tweet out your square flyer image and a short announcement about your event.  Be sure to tag your artists or performers in the Tweet if they are on Twitter, and create a Bitly link to direct people to your Brown Paper Tickets ticketing page.

Read more on effective Twitter hashtagging.

To create a short link, use Bitly.

Got an Instagram?  Post your square flyer image there too, as well as a selection of hashtags relevant to your event.  Since Instagram doesn’t let you put hyperlinks in posts, put the link to your Brown Paper Tickets ticketing page in your Instagram Bio, and include a note in your post saying “Ticket link in bio.”

For more information on Instagram’s “Link in bio” and why it’s great, check out this article.

Don’t forget to cross promote across all your social media channels.  Occasionally post a link to your Facebook event page on Twitter, or a link to your Instagram on Facebook.  Sending traffic between your social media feeds will help boost your followers across all platforms.

Now that you’ve completed these 10 steps, you’re done for the day. From preparation to announcement to the follow up, by carefully planning your announcement you should see a solid response from your social media network.  Don’t forget, however, that promoting events is all about the long game. A strong announcement is important, but consistently posting about and promoting your event between now and the event date is just as important.  Make sure that the event doesn’t fade from your network’s memories—build hype as it gets closer and closer.

Interested in learning more about announcing and promoting your event?  Contact the Brown Paper Tickets promo department.

Event Tips >

6 Easy Steps to Attract Press Coverage


Media TruckWithout promotion, something terrible happens…nothing!
– P.T. Barnum

A write-up in the newspaper or a television spot featuring your event can attract throngs of fans, boost ticket sales and make you appear like a “big name” even when you’re just starting out. It’s worth the effort.

But everyone else is clamoring from press attention, so how do you get it? Follow these 6 steps:

1. Laser-Focus Your Media Outreach

These days, reporters have tighter deadlines than ever before, along with stuffed email inboxes and constant content to produce. They are not only responsible for making short deadlines and editing their own work; they may be required to maintain blogs, video or social accounts.

In short, they’re busy. That’s why laser-focusing your media outreach is so important. Send your pitches and press releases off to the right publications. Check your publication’s editorial calendar online if it’s public, so you don’t make the mistake of sending a pitch on a story they just covered. An editorial calendar can also clue you in to what topics they’re going to cover in the future.

Ask your fans what they read or watch—it could include anything from newsletters to blogs and social media. Tally responses and remove media outlets that do not influence your local market. From there, create a “top 5” list.

Never hound journalists. Think of media outreach like dating—the slightest air of desperation is an immediate turn off. If an editor or journalist “ghosts” you (doesn’t respond to your pitch), assume he or she is not into it and move on. Follow-up only once, if that.

Did you know Brown Paper Tickets offers free promo advice and support to event organizers? Just call us at (800) 838-3006 or email promo [at] brownpapertickets [dot] com.

2. Identify Your Unique Value Proposition 

 Identify what makes you unique before you pitch. Ask yourself two questions:

  • What is it about your show that makes new ticket buyers want to spend their hard-earned money?
  • What makes your event worth the price?

You Had Us at “All-Cat Rock Band”

Acrocats-CatPiano

See the Amazing Acro-Cats, a cat circus that recently appeared on the Colbert Report and tours nationally, in a big, feline-festooned bus.

The “unique value” of the cat circus seems obvious. Who wouldn’t want to see a cat circus? But suppose I am a reporter. I get invited to lots of things and maybe I pass on the amazing cat circus because I just wrote about a circus act last month.

How about an all-cat rock band, the “only in existence” with a lead performer named Tuna who plays a mean kitty cowbell? Bingo, that’s a unique value, the “silver tuna,” if you want to get pun-y. Acro-Cats’ show also teaches clicker training, encourages adoption and gives money to cat rescue. All of those things make the show unique and valuable to ticket buyers.

Add your unique value proposition to the title, description and headline of your press release or in the opening paragraph of your pitch email.

If you’re wondering, the Amazing Acro-Cats will be in “Mew” Orleans for a Meowy Catmas December 4 – December 20.

3. Use Objective Superlatives 

Now that you have a unique value proposition, you’ll need to find your superlatives. Remember, reporters need provable facts. They cannot use wildest, most creative, most fun, most unique because those are subjective.

Add measurable facts to your media outreach materials. Maybe your event is the largest or the only event in a specific genre. Or maybe the event had more performers or performances than any other in the state or country.

Back up your claim in one sentence:

The largest metal music festival in Kalamazoo, Michigan

The only all-cat rock band in existence

The longest-running food and wine tour in Napa

4. Go Local

Localize your event to create an attractive angle for the press to cover—add a location name to the title and choose the largest community possible to reach a greater amount of people.

But if the smaller place has more oompf and cache for your specific event, use that. A Hollywood burlesque fest might attract more attention than a LA burlesque festival because Hollywood is all about glam.

Have your performers reach out to his/her local neighborhood blogs to let them know about the “hometown guy or gal makes it good” story with your event as the hook.

5. Offer Visuals

Reporters are strapped for time; publications are strapped for cash. They won’t likely send a photojournalist and a reporter to your event—be prepared to provide g-rated, safe-for-work, high-res photos and videos. Ask your performers for headshots and keep them at the ready, so you don’t lose the story.

When it comes to video, remember that television stations aren’t likely to use promotional videos with music, graphic, credits or logos embedded over them.

Be professional and responsive. If you work well with the reporter the first time, they may run stories on your event in the future.

6. Get Listed

The low-hanging fruit of the PR world, calendar listings are easy to get and almost always generate ticket sales. Newsletter, blogs or The New York Times, most publications have calendar listings. Search for “how to submit an event” and carefully review and follow submission instructions. If you can’t find instructions, ask the publication if they’re willing to write about it or include it in topics shared with the community.

What are your secrets for getting press coverage or working with media? Share your thoughts in the comments.

Event Tips >

8 Secrets to Writing Event Pages That Convert

BPT_Icons_Typewriter-01The bad news: From email newsletters to Facebook posts to the New York Times, the moment your prospective customers arise, they’re bombarded with things to read. You get a few mere seconds to hook ’em, which means your event description and website copy needs to be polished and punchy.

The good news: You don’t have to resort to all caps headlines (YOU’RE SCREAMING), inappropriate visuals or sixteen exclamation points to sell tickets.

1. Talk the Talk
Burlesque performer Sailor St. Claire’s website is an amazing example of brand voice and well-done copy. “With her scintillating wit and copious charms, Sailor channels academic excellence into burlesque bravura …”

Scintillating wit, copious charms. Just by the word choice, we know she is one literary lady.

Fancy $2 words work well to attract a bookish burlesque audience, but could turn away down-to-earth attendees of a hot dog eating contest. Use nomenclature that appeals to your prospective event goers.

2. Sensory Details
Good writing helps readers see what you see. Vague writing gives a blurry image and puts your reader to sleep.

Eliminate “beautiful, great, fun, perfect, unique” from your event page. “What makes it unique?” “Perfect?” “Fun?” Draw out the descriptive details.

Flex your vocabulary. If your event is a poetry reading at a “burnt-out warehouse down by the docks” (yes, that’s a Seinfeld reference), avoid the descriptive term, “unique.” It’s edgy. It’s industrial chic, a hip hideaway, a creative hive with high ceilings.

3. Be Specific
Avoid writing “we will serve food.” Your prospective ticket buyers won’t know if you’re going to hand them a bag of Fritos or a Cornish hen.

You might not know ahead of time the specific dishes you’ll serve, but there are nuances between words for food. “Snacks” is more dips, chips and veggie plates, while “hor d’oeuvres” is toothpick and finger sandwich food. “Snack” lends itself to a more casual affair, “hor d’oeuvres” says black ties and heels.

When specific, little details wrangle expectations and offer a clear image of the event.

4. Don’t Dare Bury the 5 “W”s
Providing sensory details helps your ticket buyers envision the event, but don’t bury who, what, where, when, why. Include your performers’ or instructors’ names and past performances or awards in your event description. Read this PR post for more on how to find your unique value propositions.

Break up the text to three sentences per paragraph. Avoid huge paragraph blocks. Add the nearest subway lines or parking tips to ease commuter anxiety. Let your event goers know if they don’t need to be “on time” and can just drop in.

5. A Few Words on Brevity
“I have only made this letter longer because I have not had the time to make it shorter.” Blaise Pascal, the Provincial Letters.

One mistake nascent writers make is far too much. Never assume your reader will pore over every word. In fact, assume that they won’t. Especially on an event page.

Go ahead, write it all out, but then go back in and trim, trim, trim. Here’s how:

Hunt down redundant terms and descriptions. Did you describe something twice? Are you guilty of duplicating details? (See what I did there?)

Just say no to passive voice. Passive voice is like an ill-fitting t-shirt. It isn’t wrong, but it isn’t doing you justice. Tattoo the words: am, are, was, were, be, being, been on the inside of your wrist. (OK, fine, just put them on a post-it near your desk.) When you notice these, switch up the sentence so it’s active.

Passive: The event was attended by more than 600 excited people.
Active: More than 600 excited people attended the event.

Punch it up. Employ one-word sentences and don’t fear phrases. 

“Amazing. Still a ticket left to see our band rock the Warehouse this Friday. Is it yours?”

“It’s amazing, there is still a space left to see our band rock the Warehouse this Friday night at 3:00PM in the afternoon. Could it be yours?”

6. Prominent Call-to-Action (CTA)

Marketing-BPT-CTA

Put a Brown Paper Tickets’ button or text link “above the fold,” (i.e. positioned in the top half) of your website. Never make your customers search for the link to buy tickets. Write your call to action in the imperative. Buy Now, RSVP, Join the Party. You can be creative, but for best results, give an action to take.

7. SEO for Success
Do not slap your flyer on your website and call it a day. Image files are not readable by search engines like Google. Fill out all related categories on your Brown Paper Tickets’ page and use keywords in your title and on the page (e.g. food and drink for a cooking event, etc.) More about SEO.

8. Hashtag It
Giving-Tuesday Advertise your hashtag on your event flyer and page and prominently display it on signage at the event. A hashtag points your attendees to where to talk about your event and streamlines feedback for your post-event analysis. Encourage your attendees to post photos. Research hashtags.

Have a writing tip? Ring in below.

Event Tips >

3 Secrets to Booking Great Shows

Music Festival Booking TipsI booked my first punk show in 1991 at the tender age of 18, so that’s 23 years of experience booking shows. Crazy.

A lot has changed. Nearly all communication was via phone or letters. Very few venues were keen on booking punk rock, so finding a venue (let alone an all-ages venue) was a challenge. To get the word out, you literally had to visit every town within a 100-mile radius and physically hang posters. Or find that town’s punk rock record store and give everyone with dyed hair or a leather jacket a handbill.

These days, it’s much easier to get the word out and to communicate with artists and venues. In fact, whole tours can be booked and promoted without making a single phone call or leaving home. That said, there are still some important things event organizers and producers should keep in mind when booking a night of music.

Here are three tips to steer you in the right direction:

1. Curate Your Bills

Back in the day, many things fell under the punk rock or “alternative” umbrella – a bill could feature a ska band, a psychobilly band and an electronic act. Today, music fans are easily able to fine tune their tastes and genres. The most successful bookers I know are ones who really got to know the bands’ sound and audience. They realize that even though the opener may not have a huge draw yet, the headliner’s audience will probably dig them. In this case, the sound of the bands, not their draw matters. This helps build the opener’s audience and creates a night of music tailored to the audience’s tastes. The audience not only gets to see the band they love, they also may discover a new favorite act.

2. Limit Your Acts

Playing or attending shows with five or six bands drives me crazy. It’s a disservice to everyone because bands have to play super short sets, get gear on and off as quickly as possible and audiences spend more time watching bands set up than watching them perform. Big bills can work for special events like festivals, but even then there should be a shared backline of drums and bass to ensure smooth transitions between acts.

Some bookers argue that more bands equals a bigger draw, but I’ve found the opposite to be true. Most fans would rather see a full set from their favorite band than a condensed one. They will likely hold out for a later bill where they can see a full set. Additionally, the bands know they won’t be able to flex their muscles performance-wise and will split the door amongst six other bands, so there’s little incentive for them to promote the show.

3. Promote (And Not Just on Facebook)

With the onset of social media, guerrilla promotions have fallen by the wayside. Often, producers and organizers seem content with creating a Facebook event page and shooting out a couple tweets. While this is an essential part of your promotional plan, don’t rely solely on social media, especially considering Facebook’s diminishing reach. Get out there and hang posters, contact the local press or bug some folks at your local independent radio stations. Basically, do all the old school “guerrilla” promotional tactics in conjunction with social media.

Nothing is more compelling than seeing a cool poster all over town or being handed a playbill by one of the band members. Get creative. You’ll see better results.

Share your thoughts and event tips for booking shows.

Photo Credit: Amanda Halm

Event Tips >